Example notebook for import-export operations with pyMOE
In the following is exemplified how to:
Transform a (multi-layer) .gds file into a grayscale image file (allowed extensions as accepted by opencv, e.g. .tiff, .png, .jpg …)
Transform a grayscale image file into a dithered image file
Transform a grayscale image file (.tiff, .png, …) into a gds file (with squared pixels)
Extra: Merge all pixels (or shapes) in a layer inside a .gds file
[1]:
# Notebook display options, change as your preference/system
%matplotlib inline
%config InlineBackend.print_figure_kwargs={'facecolor' : "w",'bbox_inches':None}

import matplotlib as mpl
mpl.rcParams['figure.dpi'] = 120
[2]:
import sys
sys.path.insert(0,'..')
sys.path.insert(0,'../..')

from matplotlib import pyplot as plt
import numpy as np

from scipy.constants import micro, nano, milli

import pyMOE as moe
Export a created mask using gdsconverter
[3]:
###Here we create a gds/dxf file using the generate and the gdsconverter modules
####generate a fresnel phase mask and save it into gds
N_pixels = 101 # nr of pixels
focal_distance = 5000*micro # focal distance in um
refractive_index_633 = 1.630115
wavelength = 633*nano
mask_width = 500*micro #x-size in um
mask_height = 500*micro #y-size in um
radius = 250*micro
n = 10 # number of gray levels
##############
###Fresnel mask with a truncated circular aperture
# Create empty mask
aperture = moe.generate.create_empty_aperture(0,mask_width, N_pixels, 0, mask_height, N_pixels)
center = (250*micro, 250*micro)
# and truncate around radius
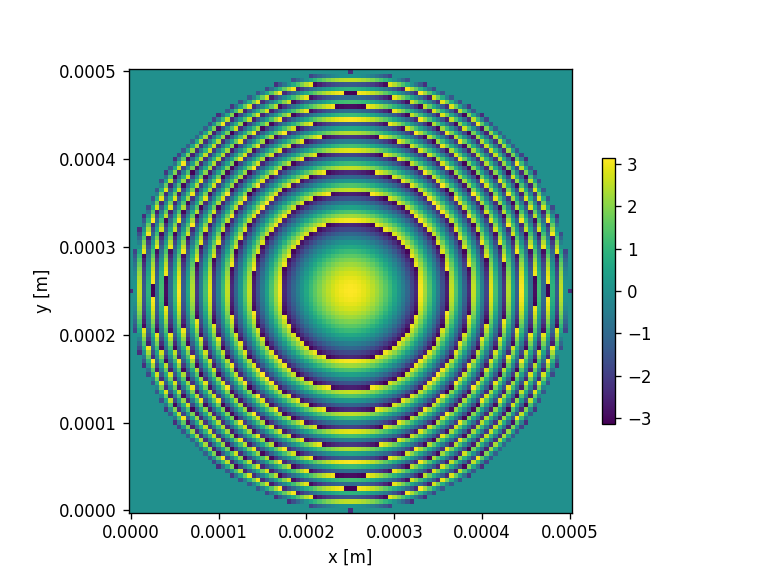
mask = moe.generate.fresnel_phase(aperture, focal_distance, wavelength, radius=radius, center = center)
moe.plotting.plot_aperture(mask )
Convert phase mask to height map
[4]:
# Unwraps the phase and plots the aperture
mask.phase_unwrap()
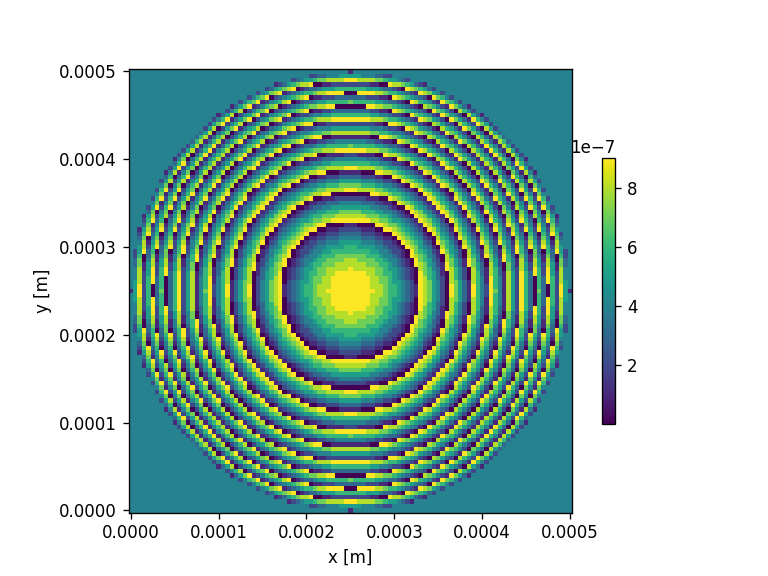
# Converts the phase to height
mask.phase2height(wavelength, refractive_index_633)
# define the maximum height of the mask
height_2pi = moe.sag.phase2height(2*np.pi, wavelength, refractive_index_633)
print(f"Maximum height of the mask: {height_2pi/micro} um")
mask.modulos(height_2pi, normalize_to_max=True)
print("Discretizing mask to number of gray levels: ", n)
mask.discretize(n)
moe.plotting.plot_aperture(mask)
Maximum height of the mask: 1.0045785293160772 um
Discretizing mask to number of gray levels:  10
Export mask to gds and dxf files
.dxf files are recorded with layer names with the naming convention LevelXXX_0.000 where XXX is the layer number and 0.000 is the respetive expected depth for that layer in microns.
[5]:
gdsname = 'examplemask.gds' # name of dxf file+
dxfname = 'examplemask.dxf' # name of dxf file+


#initialize the GDS converter class
gdsmask = moe.GDSMask(mask)

# Create layout and merge polygons together if merge=True
gdsmask.create_layout(mode="raster", merge=True)

gdsmask.write_gds(gdsname)
gdsmask.write_gds(dxfname)
<class 'pyMOE.aperture.Aperture'>
Mask has 10201 number of points distributed in 10 layers
Creating individual pixel polygons
Progress: [####################] 100.0%
[Create Polygons]
Elapsed: 0:00:00.146855
Merging polygons inside layers
Progress: [####################] 100.0%
[Merging polygons]
Elapsed: 0:00:00.044804
[Total time converting to GDS]
Elapsed: 0:00:00.192157
Saving file to examplemask.gds
Saved examplemask.gds
[Saving GDS file]
Elapsed: 0:00:00.012943
Saving file to examplemask.dxf
Saved examplemask.dxf
[Saving GDS file]
Elapsed: 0:00:00.202611
Convert height map dxf file to grayvalue from calibration lookup table
[6]:
gscalibration = moe.GrayscaleCalibration()
# load calibration file
gscalibration.load_calibration("calibration.csv")
# Load mask file
gscalibration.load_gdsfile(dxfname)
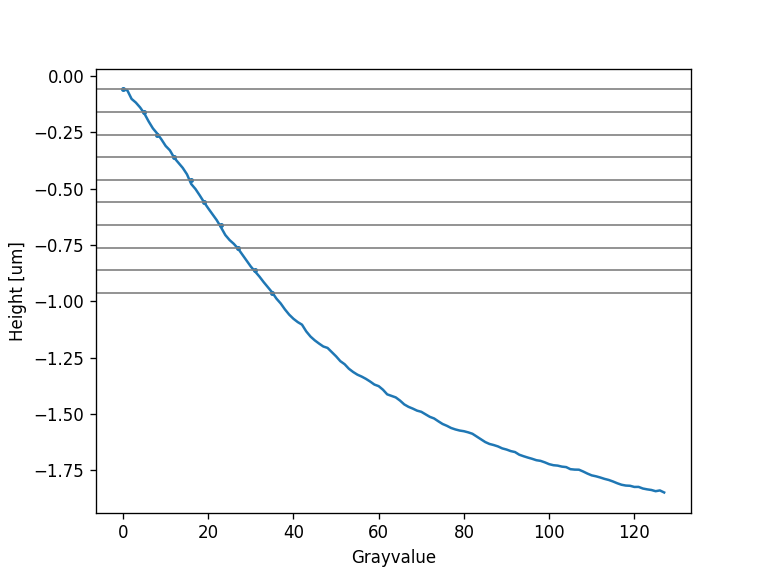
# Extracts the height levels from the layer names
gscalibration.get_levels_from_layer_names()
gscalibration.plot_calibration()
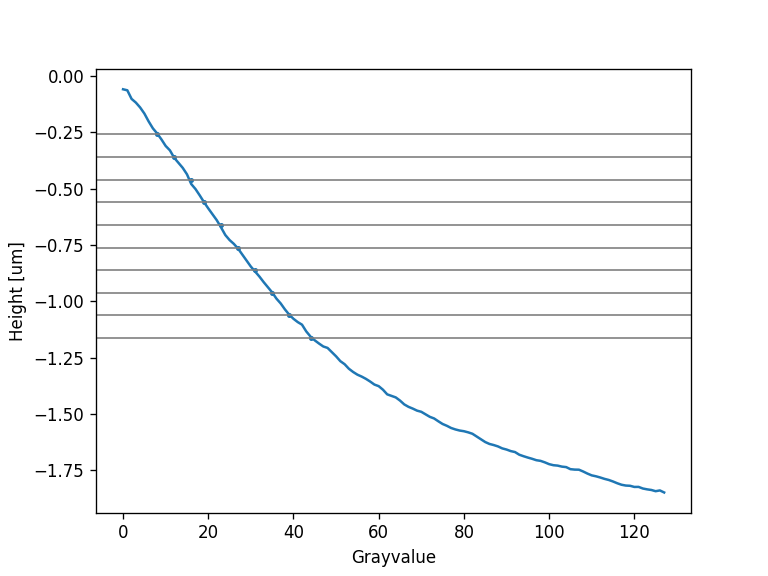
# Adjust the height offset gray values
height_offset = -0.2
gscalibration.adjust_grayvalues(height_offset)
gscalibration.plot_calibration()
outfile = dxfname.replace(".dxf", "_grayscale.dxf")
gscalibration.calibrate_layer_names()
# Add fiducials and alignment marks to the mask
corner_length = 500#*micro
corner_width = 100#*micro
field_width = 10000 #*micro
field_height = 10000 #*micro
# Layer number of the fiducials and label names
layer = "layer127"
gscalibration.add_corners(field_width, field_height, corner_length, corner_width, layer)
# Text to use as label
label = "label 01"
gscalibration.add_label(label, position=(-4000, -4000), mag=1000, layer=layer)
gscalibration.save_calibrated_gdsfile(outfile)
Grayscale calibration range is 1.789 um
Loaded mask with 10 levels
Mask range is 0.904 um
[Saving calibrated GDS file]
Elapsed: 0:00:00.177721
Saved examplemask_grayscale.dxf
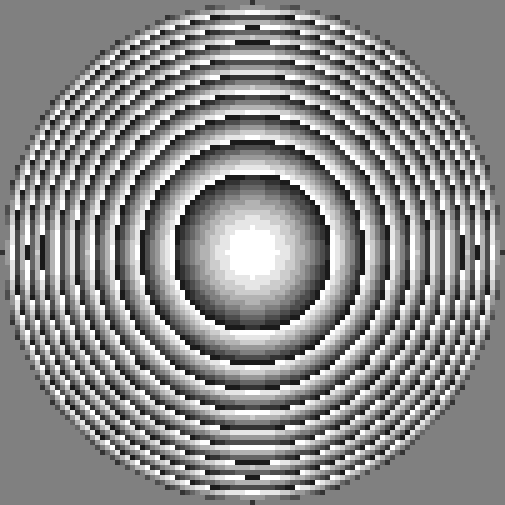
Transform layered .gds file into a grayscale image
[7]:
##Start with an existing file
#Might take a while
infile = gdsname
outfile = gdsname.replace(".gds", ".bmp")

n=10

moe.importing.gds2img(infile, outfile, int(n),  rescaled=0, verbose=True)
Layers: [1, 2, 3, 4, 5, 6, 7, 8, 9, 10]
Datatypes: [0]
xmax is 502.5
ymax is 502.5
xmin is -2.5
ymin is -2.5
Imported file examplemask.gds and exported into examplemask.bmp with size 502 x 502 pixels.
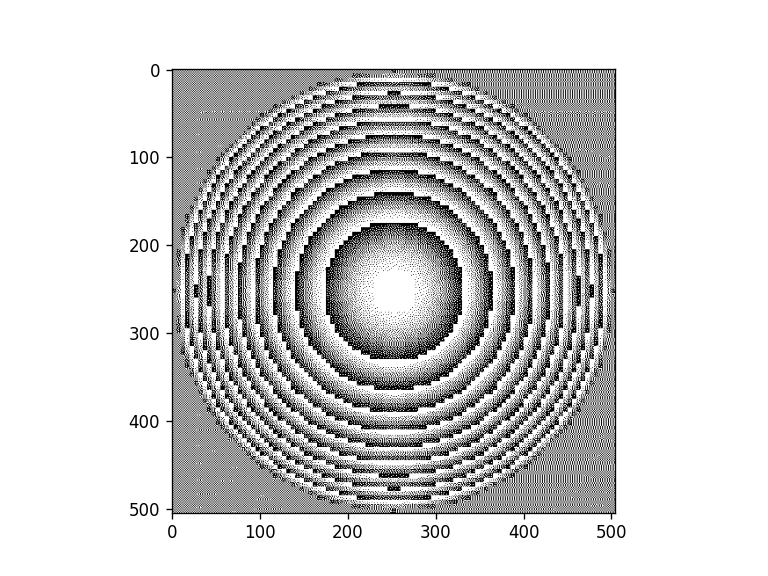
Transform grayscale image into (binary) dithered image
[8]:
##Make a dithered mask from the tiff obtained from the gds
import pyMOE.dither as dith

inputimg = outfile
ditherimg = inputimg.replace(".bmp", "_dither.tiff")


#make dithering using the floyd steinberg algorithm now
moe.dither.dither_img(inputimg, ditherimg, plotting=True)
Transform binary image file into single layered .gds file
Transform a dithered image into a gds file, using a fractioning of the image
[9]:
infilxe = ditherimg
outfilxe = infilxe.replace(".tiff", ".gds")


pixelx = 1 #um
pixely = 1 #um
cellname = "TOP" #name of the gds cell
graycolor = 0 #black pixels
frac = 250 #size of frac pixels in the image

moe.export.grayim2gds_writer_frac(infilxe, outfilxe, pixelx, pixely, cellname, graycolor, frac, verbose=False)
Sucessfully imported img!
505
505
Exported the image file examplemask_dither.tiff into examplemask_dither.gds
Transform a dithered image into a .gds file, using the whole image
[10]:
infilxe = ditherimg
outfilxe = infilxe.replace(".tiff", "_2.gds")
cellname = "TOP" #name of the gds cell
graycolor = 0 #black pixels
pixelx = 1 #um
pixely = 1 #um

moe.export.grayim2gds_writer(infilxe, outfilxe, pixelx, pixely,cellname, graycolor, verbose=False)
Sucessfully imported img!
505
505
Exported the image file examplemask_dither.tiff into examplemask_dither_2.gds
[11]:
###Using instances to create the dithered gds file (faster and less heavy files)

#(Takes less than 1 min)
infilxe = ditherimg
outfilxe = infilxe.replace(".tiff", "_instances.gds")

cellname = "tops" #name of the gds cell
graycolor = 0 #black pixels
pixelx = 1 #um
pixely = 1 #um

moe.export.grayim2gds_writer_klops(infilxe, outfilxe, pixelx, pixely,cellname, graycolor, verbose=False)
Sucessfully imported img!
505
505
Exported the image file examplemask_dither.tiff into image.gds
Starting making instances
Done
Extra: Merging shapes in the single layer .gds file
The “pixelated” gds files (without instances) are typically large. The file size can be reduced by merging the pixels - the merge operation can be done using the gds_klops module
[12]:
import pyMOE.gds_klops as gdsops

inputfile = outfilxe
outputfile = inputfile.replace(".gds", "_merged.gds")
cellname = "TOP" #name of the gds cell
layer = int(0)
datatype = int(0)

moe.gdsops.merge_layer(inputfile,cellname, layer, datatype ,outputfile )
Merged layers in examplemask_dither_instances_merged.gds
[13]:
#uses the instatiated gds
infile = ditherimg
outfilxe = infile.replace(".tiff", "_instances.gds")
outputfile = outfilxe.replace("_instances.gds", "_instances_merged.gds")
cellname = "TOP" #name of the gds cell
layer = int(0)
datatype = int(0)

moe.gdsops.merge_layer(outfilxe,cellname, layer, datatype ,outputfile )
Merged layers in examplemask_dither_instances_merged.gds